A custom attribute is always associated with a company and a class name. Currently, data related to a custom attribute is stored as a string in the database, with a maximum length of 50 characters.
The page displays a list with 10 possible Custom Attributes. These 10 fields represent 10 columns in the database.
| Warning: Changing the size or type of an existing fields will not change the data saved in the database and may have unexpected effects when displaying and/or saving the data. |
| Note: Only fields with the option "enabled" checked will be displayed as a custom attribute on the list page for the class. |
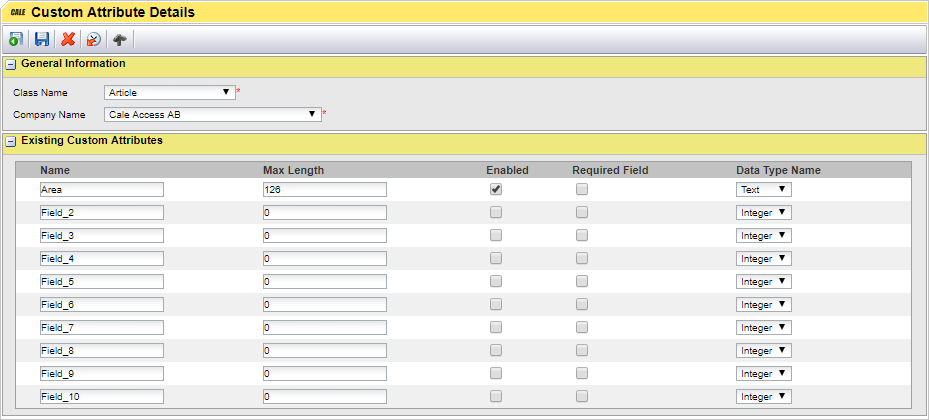
1.In the Class Name list box, select the class name for which the custom attribute applies.
Available Classes:
○Article
○Blacklist
○Card Company
○Company
○Company View
○Geographic Section
○Parking Space
○Terminal
○Terminal Attributes
○Terminal Structure Node
2.Select the Company name for which the custom attribute applies.
3.In the Name text field, enter a name for the custom attribute.
4.In the Max Length text field, enter the maximum length of the input of the attribute.
5.To enable the attribute, check the Enabled box for the attribute.
6.If the attribute should be required, check the Required Field box.
7.In the Data Type Name, choose if the input of attribute should be an Integer, Date, or Text.
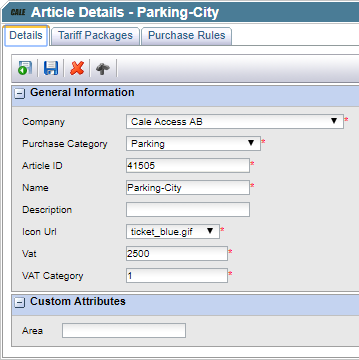
After having added a custom attribute to a class, a text field for entering a value is added to the detail form of the class. The text field label corresponds to the name assigned to the attribute in step 5 above.
For example, when a custom attribute named Area is added to the class name Article, the Article Details page will display the text field in the Custom Attributes area.
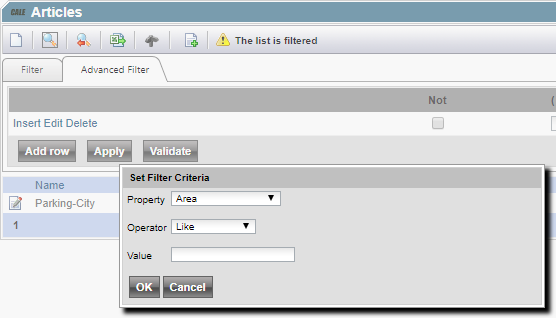
The fields are also available for filtering using Advanced Filtering