Click on the Insert button to open an empty Service Routing Details page
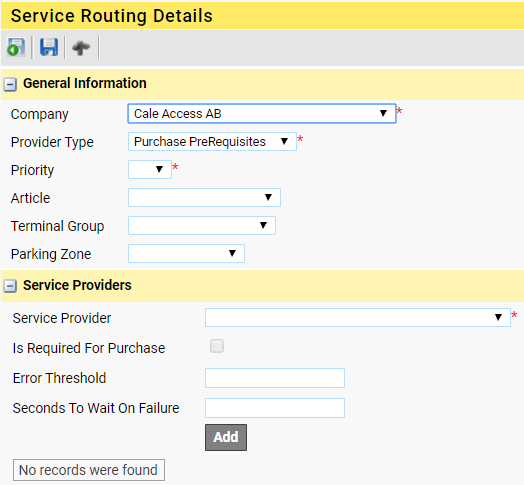
•Select the Company that will use this routing.
•Select the Online Purchase Transfer as Provider Type. The page will update with the correct fields for the selected type
•Set a Priority: the priority runs from 1 (Highest) to x (Lowest). When setting a priority that already is set for another routing this routing and all other routing ‘below’ this one will be pushed down to make space for the new routing.
•Optional: Select the Tariff Package, the Article, the Terminal Group, and/or the Parking Zone for this routing
•Select the check box Send Purchase Updates if updates are to be sent to the Service provider. If this box is checked, updates will be sent at post payment check-in/checkout.
| Note: Send Purchase Updates is only supported for Online Purchase Transfer version 2 and higher. |
•Select the "Used Also For PostPayment Transactions" if the routing shall generate messages for Post Payment
•Select the Service Provider(s) you want to create a routing for in the next section
| Note: If your provider is not available, go to the Service Provider page and add one. See Service Provider. |
Adding Service Providers to a routing
1.Select a provider from the drop-down list
| Note: Depending on the provider, an additional text box can become visible to enter specific configuration data. 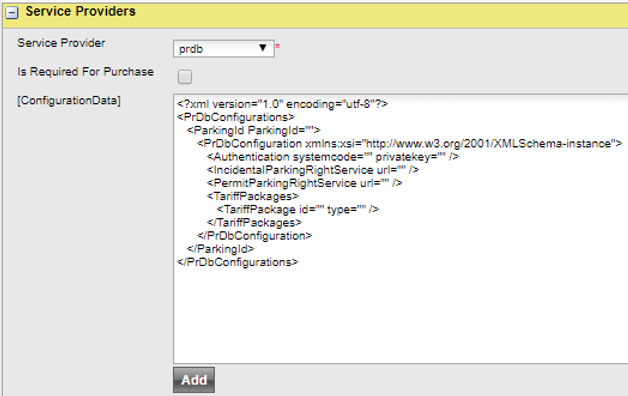 |
2.If this provider is "Required For Purchase" check the check box
3.Set the Error Threshold, default 10 retries.
4.Set the "Seconds To Wait On Failure", default 300 seconds.
5.Click [Add]
6.Repeat steps 1 to 5 if you need more providers
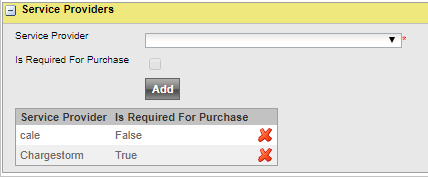
When additional configuration data is available the list will show an "edit" icon
