CWT Compact S2 Installation & Maintenance Manual
| Note: The printer shelf comes in two varieties. The older version (version 1) has a long plate mounted in the cabinet with a lock mechanism at the end of the plate. The newer version (Version 2) has lock directly after the hinge. Both types are displayed in the manual. |
Printer shelf version 1
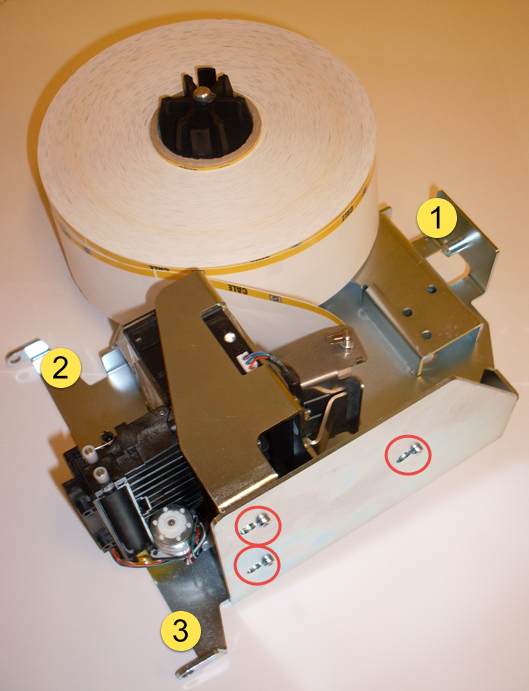
The printer is mounted on a shelf and secured by means of screws on the bottom of the printer.

Figure 61, Printer mounting on Printer shelf version 1

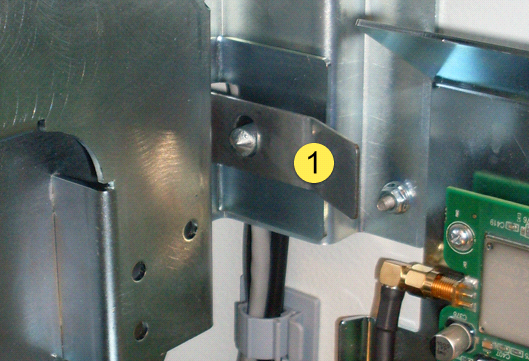
Figure 62, locking latch on version 1
To remove the printer module, pull the locking latch (1) while you swivel the module to the right, then lift the complete module away from the hinges (2 and 3) on the door frame. To replace the printer module, place it on the hinges on the door frame and swivel the module into its locked position.
To remove the actual printer from the module, simply release the three screws holding it in place, move the printer forward and lift it from the mounting plate.
Printer shelf version 2
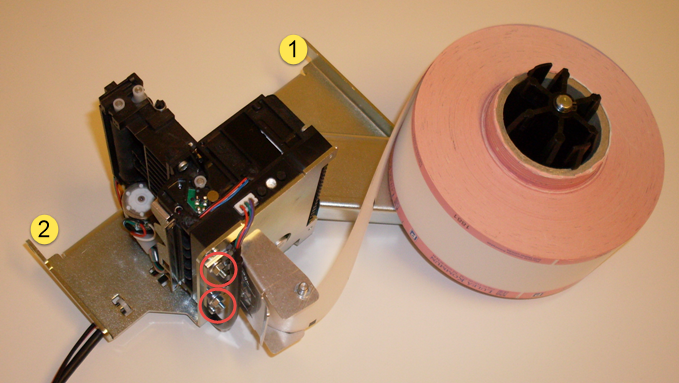
The printer is mounted on a shelf and secured by means of screws on the back of the printer.

Figure 63, printer mounting on Printer shelf version 2
To remove the printer module, pull and swivel the module to the right, then lift the complete module away from the hinges (1 and 2) on the door frame. To replace the printer module, place it on the hinges on the door frame and swivel the module into its locked position.
To remove the actual printer from the module, simply release the two bolds holding it in place. Lift the printer from the mounting plate.
