Many lists include an Advanced Filter tab in the filter area. To be able to use the advanced filtering function, your user account must be set up with that function. See chapter User Accounts.
Clicking the Advanced Filter tab displays the Advanced Filter area, where you can combine many filter criteria for advanced filtering purposes.

When you display the Advanced Filter area, existing filters are displayed as one row per condition. The above example contains two rows:
•The Purchase Date set to Dynamic Time Span > Last 24 hours.
•The Purchase State set to Completed.
To delete a filter from the Advanced Filter area, click Delete on the row to delete it.
To add additional filter criteria, click Add row.
1.When you click Add row, the Set Filter Criteria dialog is displayed:
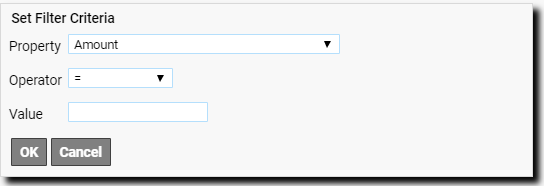
2.In the Property list box, select the desired list item.
3.In the Operator list box, select the desired operator. For explanations, see Filter field types.
4.In the Value field, select/specify the desired value.
5.Click OK. The new filter condition is added as a new row to the Advanced Filter area.
To use more filter criteria, keep adding rows in the same way.
Use the Row Operator list box to select "And" if the condition on the current row and the next row should both be true for the filter to select records. If either of the conditions should be true, select "Or".
Button/controls in the Advanced Filter area:
Button/control |
Explanation |
|---|---|
Insert. |
Displays the Set Filter Criteria area, just as the Add row button. The difference is that once you click OK, the new criterion is inserted below the row where you clicked Insert. |
Edit. |
Let you edit the filter criterion. |
Delete. |
Deletes the row. |
|
Displays the Set Filter Criteria area. Once you click OK, the new criterion is added at the bottom of the criteria list. |
|
Applies the current filter settings on the list. After having made changes to filter conditions, you need to click Apply again. |
|
Let the system check if you have created a set of functional filter criteria. |
|
Opens the Saves Filter dialogue, which lets you save the filter as a personal filter. |


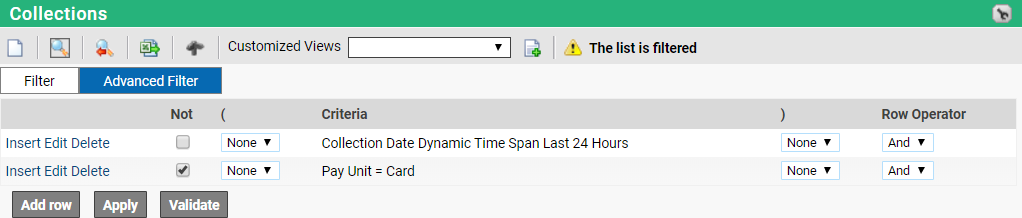
Example 1:
By checking the Not check box, you can reverse a condition. The below example shows how all pay units except Card will be displayed in the result.
| Note: Selecting the "Not" check box is not the same as using "Or" as Row operator. In the example below the filter will try to find all collections within the set time frame but will omit all records that have a pay Unit of type Card. If the row operator was set to "Or" instead, the filter would retrieve all record fitting the defined time frame, then add all the remaining records that match the Pay Unit. |
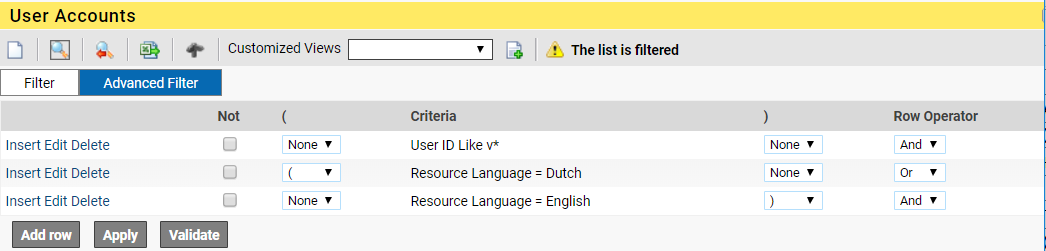
Example 2:
Use Parentheses to group the conditions.
This filter will display all users whose first name begins with a ‘v’ whose language is set to either Dutch or English. The Parentheses are set around both languages with an ‘or’ operator to select all the languages requested.