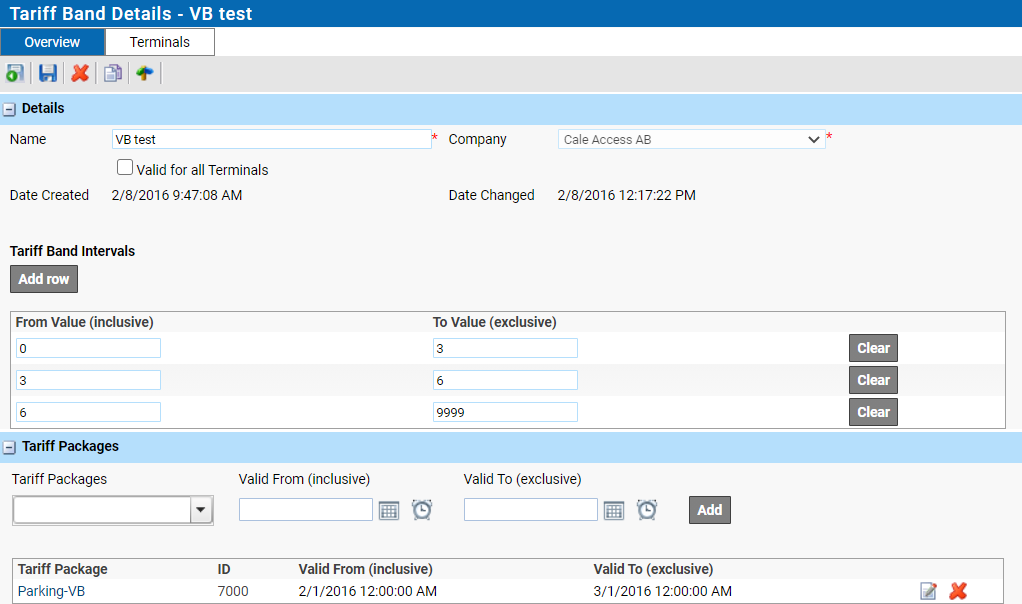
To create a Tariff Band:
1.Set a unique name.
2.Select the company for the Tariff Band.
3.Check the Valid for all Terminals if this tariff band will be used for all the terminals in the company. If not checked the “Terminal” tab will be available.
4.Click the Add row button to add an empty interval. Set the ‘From value’ to zero and the ‘To value’ to the exclusive end of the interval. In the example, the ‘To value’ is set to 1. All purchases from 0 to 0.99 will be added to this interval.
Repeat adding intervals until you cover all the possible purchase values. The intervals shall not overlap.
| Note: A tariff band interval consists of a defined range with an inclusive lower value and an exclusive upper value. Typically, the next interval’s lower value should be equal to the previous interval’s upper value to cover all possible values. |
5.Select the Tariff package to use for this Tariff Band.
| Note: A tariff band can be related to several different tariff packages and a tariff package can be related to several different tariff bands, but a tariff package can only be related to one specific tariff band at a specific time. This can be achieved by defining a start- and end-date of the relation between the tariff band and the tariff package. |