Attributes of a dimension can be dragged into any area. When dragging a dimension into the Graph/Grid area, the dimension will be placed in the Category area that corresponds to the x-axis/row.
To remove a dimension, just drag it back into the Dimensions & Measures area or right click on the dimension and select Remove Dimension.
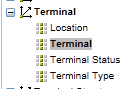
| Tip: Expand the dimension and select a specific attribute or hierarchy, e.g. the Terminal attribute of the Terminal dimension since it is not certain that the most logical attribute is chosen otherwise. |
By default, all members that contain data will be displayed in the graph/grid. Different approaches can be used to apply filtering and sorting. An active dimension is displayed as:

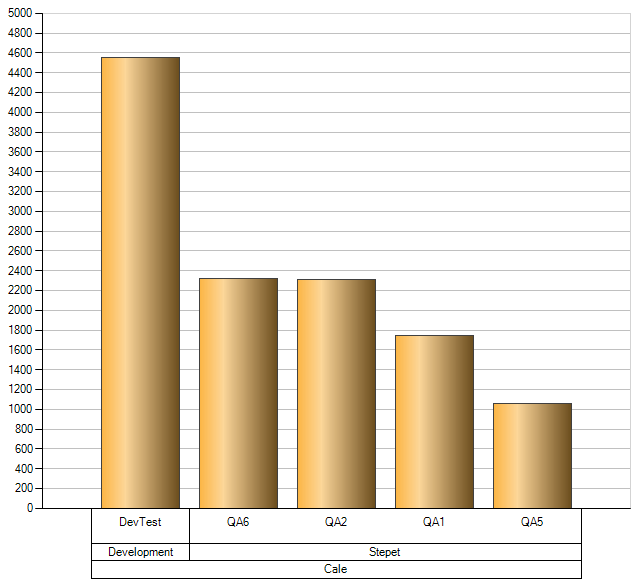
In this example no filters and no sorting are applied.
When added to the Categories or Measures areas, the following buttons can be pressed:
Term |
Explanation |
|---|---|
|
Open the member selection dialogue. |
|
Open the filtering and sorting dialogue. |
|
Apply sorting when the result is not already sorted. When pressed once, the icon is changed to |


 indicating an ascending sort order. Press once more change to descending sort order. Pressing a third time will remove sorting.
Member Selection Dialogue.
The member selection dialogue makes it possible to select/de-select individual members in a certain dimension. For an attribute, the dialogue can look like:
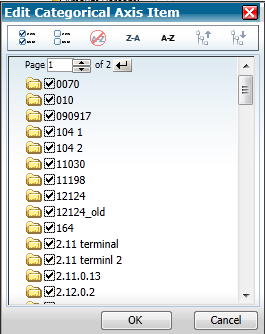
The list is paged so that no more than 100 records are displayed at the same time. This is necessary since the amount of data that should be sent to the web browser would be very large if e.g. displaying a list of 5000 items.
It’s possible to select and deselect individual items. All items can also be selected or deselected using the buttons  in the toolbar.
Sorting can be applied by using the  buttons.
| Note: The sorting buttons in the dialogue does not affect sorting in the Graph/Grid area. |
When working with hierarchies such as the terminal structure or dates, the two buttons to the right are enabled ( ). These buttons make it possible to drill down to the next level in the hierarchy and drill up.
Drilling up and down is not always the best approach when working with hierarchies.
Filtering and Sorting Dialogue.
Individual members of a dimension can be removed using the member selection dialogue described in the previous section. If we want to filter on a measures value or limit the result set, the filtering and sorting dialogue can be used.
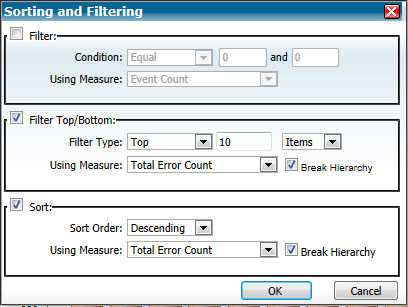
The dialogue contains three sections that can be used separately or in combination:
•Filter: Makes it possible to filter the result based on some measure. E.g., the Purchase Amount must be at least 1000.
•Filter Top/Bottom: Limits the result by an explicit number of items or a percentage, e.g. Top 10% or Bottom 10.
•Sort: Sorts the result base on a measure.
Example:
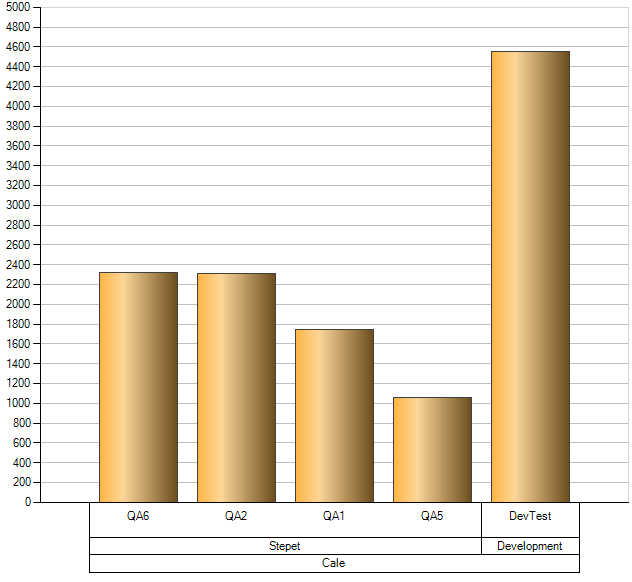
If we use Terminal as category and Total Error Count as measure in the Event Analysis function, we can display the Top 10 terminals with most problems using the settings displayed in the figure above.
The Break Hierarchy check box can be used when working with a hierarchy such as the terminal structure.
 |
 |
|---|---|
Break Hierarchy unchecked |
Break Hierarchy checked |