To add an event-forwarding item, proceed as follows:
1.On the WebOffice menu, select Cale Support > System Management > Event Forwarding. The existing forwarding events are displayed.
1.Click . The Event Forwarding Details page is displayed:
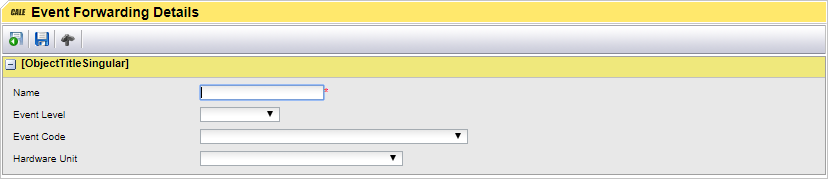
2.In the Name text field, enter a descriptive name for the event.
| Note: When it comes to the remaining three list boxes, at least one value in either list box must be selected. By only selecting a value in the Event Level list box, you will achieve a low level of granularity for the event forwarding. By selecting values in all three check boxes, you will arrive at a high level of granularity. |
3.In the Event Level list box, select a suitable urgency level.
4.In the Event Code list box, select the Event Code that applies to the event.
5.In the Hardware Unit list box, select the appropriate Hardware Unit.
6.Click  to save your changes and return to the previous page.
After having added a new event, it becomes available on the Event Forwarding tab in the User Account Details page. This page is accessed by selecting User Administration > User Accounts on the WebOffice menu.