 The possibility to create scheduled deposits is a useful feature for ensuring that online account holders will not run out of their allotted parking time.
| Note: Scheduled deposits apply to a specific tariff package. All online accounts to which the specific tariff package has been assigned will get the time amount in hours set to the amount defined in the scheduled deposit, at the intervals specified. The available amount for an account will never exceed the amount set in the schedule. |
If an account has used more time than available, the resulting available time after the deposit will be the maximum time minus the overspent time.
Example:
Time amount before a scheduled deposit = -5.
Time amount after a scheduled deposit of 100 will be 95.
To create a scheduled deposit, proceed as follows:
Click  to create a new scheduled deposit. The following page is displayed:
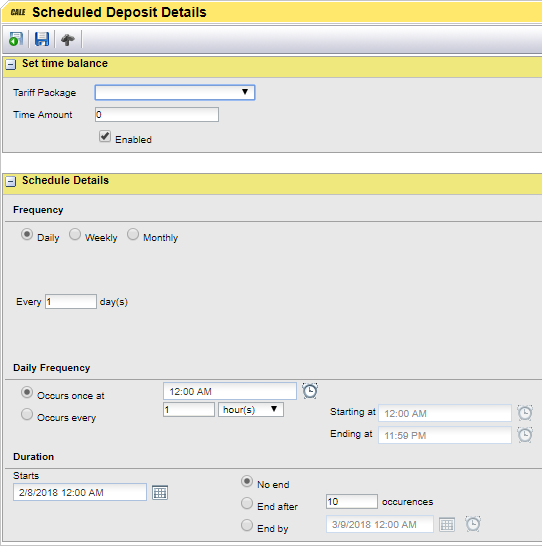
Set Time Balance area.

1.In the Tariff Package list box, select the package for which the scheduled deposit applies.
2.In the Time Amount field, specify the number of hours that should be deposited each time the scheduled job is run.
| Note: When the scheduled deposit is run, all online accounts to which the current tariff package has been assigned will each receive the specified time amount. However, there will be no accumulation of the time amount in these online accounts. What this means is that if you specify a time amount of 7, the balance in an online account will never exceed 7 hours regardless of the number of deposits (supposing the account holder consumes less than 7 hours of parking time between deposits). |
3.Leave the Enabled check box selected to set the scheduled deposit into operation upon saving the information and in accordance with the schedule details described in the steps below. Otherwise, clear the Enabled check box for now.
Schedule Details area.
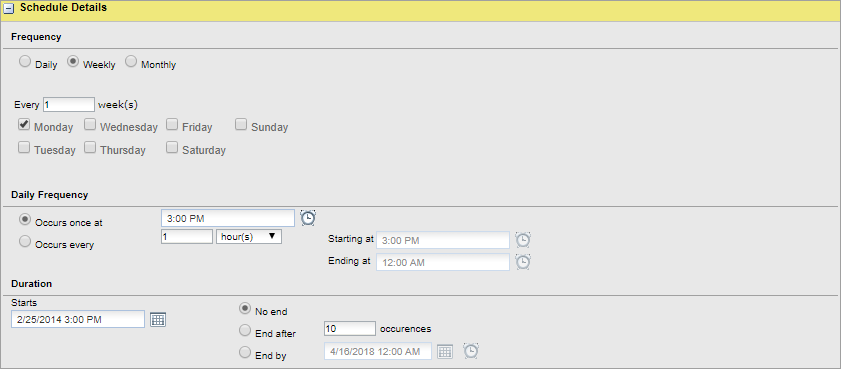
4.In the Schedule Details area, enter information about frequency and duration for the scheduled deposit. Use the time  and date controls
  where possible. As you will see, there is a great deal of flexibility in customizing the schedule according to your needs.
5.When finished, click  to save the information and return to the Scheduled Deposits page.
| Note: If more than one tariff package is used for online accounts in your company, you may want to create a scheduled deposit for each tariff package separately. |