A set of commands can be sent to the terminal by adding each command on a row of its own by using the plus button  .
.
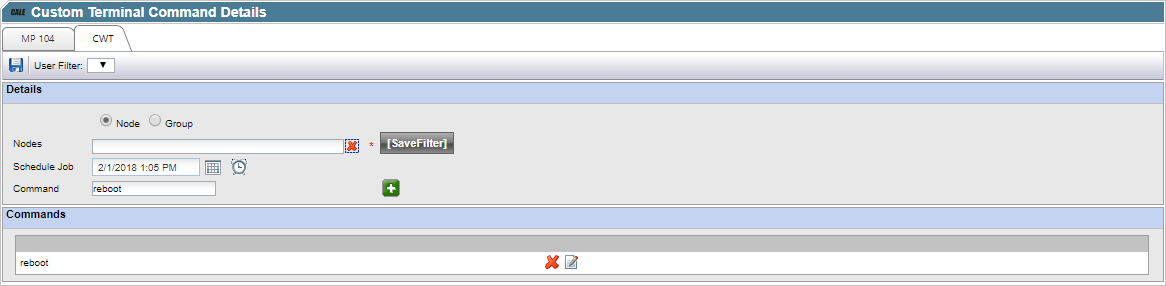
1.In the Node information field, select the terminal, terminal group, node, or nodes to which the custom command should be sent. It is possible to save the selection with the ‘Save Filter’ button. Saved filters are added to the User Filter in the toolbar above.
2.In the Schedule job field, use the date and time controls to specify a time when to send the file from the specified terminal. By default, the current date and time is displayed.
3.In the Command field, enter the command that should be sent to the terminal and press the plus button. You can add more than one command at once and it is possible to delete a command as well by clicking . You can change the details for the command as well by clicking
 .
.
4.Click  to save and return to the Custom Terminal Command page.
The status of the one-time job is shown under the Transfer Status – Name heading in the list.
In addition, the scheduled job is depicted as an icon (with text) below the assigned terminal (or node) in the terminal structure tree on the Terminal Control Centre page. Being a one-time job, the icon will disappear from the tree view when completed.