To allow a user to gain access to the impersonation account in another company, proceed as follows:
1.If not selected, select the Impersonate by Company tab.
2.In the Company list box, select the Company for whom impersonation is configured. The page is expanded showing the users for which impersonation is already allowed.
| Note: By default, inactive users are not visible. Check the include inactive users check box to see inactive users |
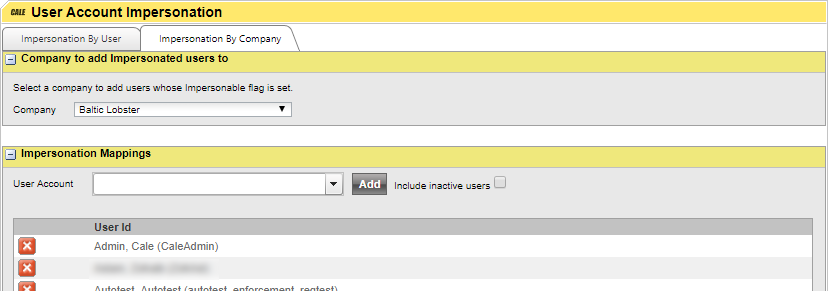
3.In the User Account list box, select the user(s) for which impersonation should be allowed.
4.Click Add when ready.
To remove a user from the list, click  . A confirmation dialogue will be displayed before the user is removed from the list.