| Note: Email verification will become active in a future release. |
To create a new user account, proceed as follows:
1.On the WebOffice menu, select User Administration > User Accounts. Existing user accounts (if any) are displayed.
2.To create a new user account, click . The following page is displayed:
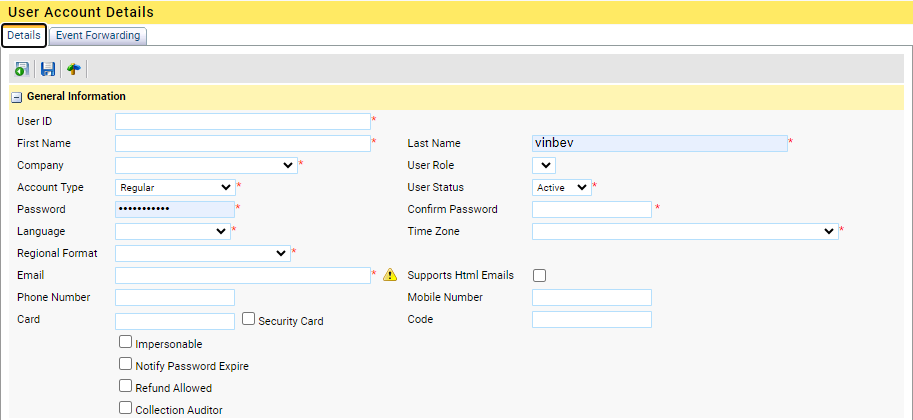
3.In the User Id field, enter the user’s User Id. The user will use this ID, in combination with a password, when logging on to WebOffice. The User Id is not case sensitive. The User Id must be system unique.
4.Enter the user’s name in the First Name and Last Name fields.
5.In the Company field, select the name of your company.
6.In the User Role list box, select the user role that applies to the new user. See Create User Role for information on how to create user roles.
7.The Account Type list box should display the Regular account type.
8.The User Status list box should display the Active status.
9.In the Password field, enter a password for the user. The password must be at least four characters of length and is case sensitive.
10.Enter the password once again in the Confirm password field.
11.In the Language list box, select the preferred language for displaying information to the user in WebOffice.
12.Set the Regional Format to the language format to be used for date, time, and value separators in numbers.
This is used to set the presentation of these values free from the computer setting used when e.g. generating reports.
13.In the Time Zone list box, select the time zone that applies to the user’s location. If users within the company are dispersed geographically, different time zones can be applied to different users. Most date values in WebOffice will then be presented according to the user’s local time zone, independently from WebOffice server location.
14.Enter the email address of the user. a verification email will be sent to the user when you save the new user account. see Email Verification for more details.
The link will expire after 60 minutes, so you may need to resent the verification email.
After the email has been verified the exclamation mark will change to:

15.Complete the information in Phone number, and Mobile number fields. The user can be alerted via e-mail and/or SMS when certain events occur in the system.
16.Optionally select the “Support HTML Mails” to send mails in HTML format instead of default text format.
17.In the Card field, enter the card number of the user’s access card (if any).
| Note: When this number contains character (e.g. a hexadecimal number) these MUST be written in upper case. |
18.Select the Security Card check box if the card is a security card.
19.In the Code field, enter the code (if any) that belongs to the user’s access card.
20.The Impersonate field allows you to grant the user to login to other companies. The companies the user may log in to are set by Flowbird Support.
| Note: This field is only visible for power users. |
21.Check the Notify Password Expire if you want to send an email to the user X days before the password expires. This number depends on the configuration of the WebOffice application. This option is meant for Machine-to-Machine accounts where the computer trying to communicate with WebOffice cannot change its password itself. The mail is sent to the managers email address.
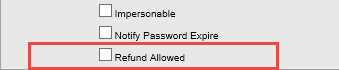
22. Check the Refund check box if the user may refund a card transaction.
23.Check the Collection Auditor check box if the user can perform a collection audit.
 Import & Export of data.
| Note: The fields Import allowed and export allowed become available after saving the account. |

Check the boxes Export Allowed and/or Import allowed if you want this user to allow to log in to these services.
You will need the Licenses for these services activated before any user with these allowances to be able to use the Import and/or Export Services.
| Reference The import and export services are described in out API documents for Import and Export. |
To limit the export function, select "Export Limited Access".
The following fields will be excluded from the export files:
•Purchase (Batch and Live Export):
oCode.
oMaskedPAN.
•CardTransaction (Batch Export):
oMaskedPAN (No default).
oExpirationDate (defaults to ‘0000’).
oServiceCode (defaults to ‘000’).
•CardTransaction (Live Export):
oCardData.
oPAN.
oMaskedPAN (No default).
oHashedPAN .
oExpirationDate (defaults to ‘0000’).
oServiceCode (defaults to ‘000’).
Refund Allowed.
When setting the Refund Allowed check box the user can refund a card purchase made against a collector (Currently Tender only).
See Purchase Refunds and Purchase Signpost Functions for more information.
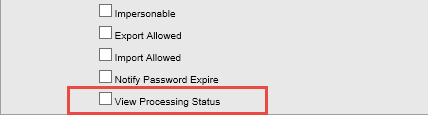
View Processing State.
| Note: After saving the account the check box View Processing status will become visible. |
See Monitoring Card Processing Status for more information on the processing status.
User Web Profile area.

The next step is to create the user’s web profile, e.g. customize Weboffice’s appearance for the current user account.
Select the appropriate check boxes to configure the user’s web profile.
Check box |
Explanation |
|---|---|
Advanced Filter. |
Select if the user should have access to the Advanced Filter button in lists. |
Display Advanced Controls. |
Select if the user should have access to advanced controls. |
Records Per Page. |
Sets the desired number of records per page in list layouts. |
After saving with the  button, the Event Forwarding tab is added to the page.
Finishing creating the user.
When finished, click to save the information. The Event Forwarding tab is added to the page.
| Note: The User Account must be connected to a user role with terminal access to the terminals that should send events to the user, see Create User Role. |