A user can be assigned to one role only. On the other hand, a role could be defined in several ways.
For example, one role could be created for members of the financial department, whose tasks are to extract and present financial information and statistics. Another role could be created for technicians and a third role for administrative staff with limited access to WebOffice functions.
This is how you create a user role:
1.On the WebOffice menu, select User Administration > User Roles. Existing roles (if any) are displayed.
2.To create a new role, click  . The following page is displayed:
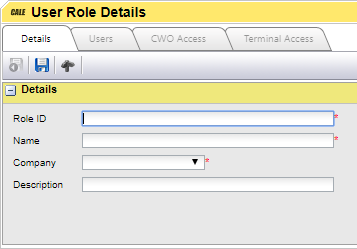
3.In the Role ID field, enter an ID for the role. The system uses the ID to connect users to the role.
4.In the Name field, enter a name for the role.
5.The Company list box shows your company name.
6.In the Description field (optional), enter a description of the role.
7.Click  and then return to the User Roles page. Find the new role in the list and click
  . The User Roles Details page is displayed, now with three more tabs available: Users, WebOffice Access, and Terminal Access.
If the PayBySpace License is active, the Add Time for Plate tab will also become visible.