If a barrier is linked to a camera, you must configure the link in the Camera detail for the specific camera.
After activating the barrier in the Zone Details - Barriers tab page, select the camera that manages the barrier for editing.
| Note: Normally only the barrier for the incoming lane will be configured. |
In the lower part of the camera, you will find 7 additional fields.
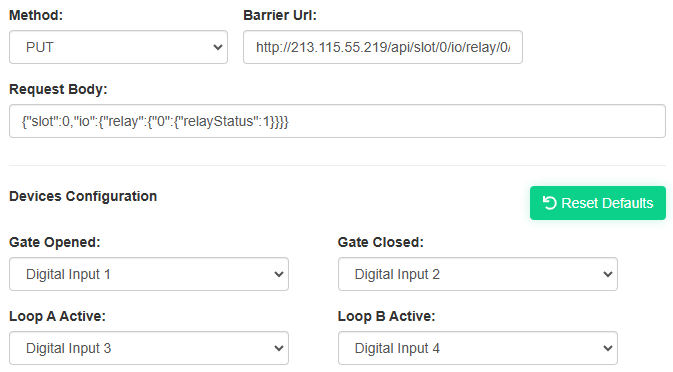
•In the "Method" select the method to communicate with the server that manages the barriers. The method to use depends on the communication protocol the server expects:
oPUT
oPOST
oGET
oPATCH
•In the "Barrier Url" specify the URL used to communicate with the ControlByWeb server
•In the "Request Body" specify the request to send to the ControlByWeb server. This data will include the barrier to manage and the action to take.
•Gate Opened, Gate Closed, Loop A Active, and Loop A Closed
For each of these statuses, you can select from the following digital inputs:
Each status can only be assigned to one digital input. (i.e., two statuses cannot be assigned to the same digital input.) You can leave a status unassigned by selecting "None."
oDigital Input 1
oDigital Input 2
oDigital Input 3
oDigital Input 4
| Note: The digital inputs and statuses assigned in Flowbird GO should match the assignments in the external ControlByWeb application. This ensures that the correct responses for the digital inputs are reflected in the Lane View status for barriers and loops. |
•Save the changes. The barrier will now become visible in the Barrier manager page.
Example
| Note: The exact format for this configuration depends on the equipment selected by the customer. |
Method: PUT
Barrier Url: http://[Host]/api/slot/0/io/relay/0/relayStatus.
Request Body: {"slot":0,"io":{"relay":{"0":{"relayStatus":1}}}}
The slot indicates in this example barrier with ID 0
The relay status indicates the action. in this case open barrier 1