To create an online account, proceed as follows:
1.On the WebOffice menu, select User Administration > Online Account > Accounts. Existing online accounts, if any, are displayed.
Click  to create a new account. The following page is displayed:
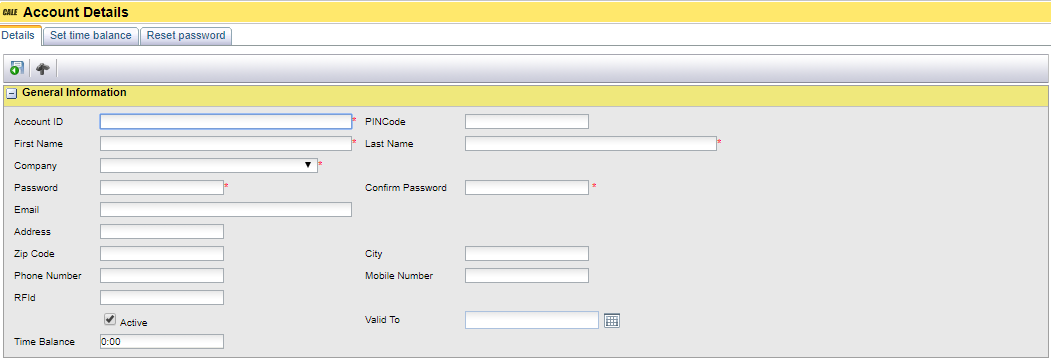
2.In the Account ID field, enter a unique ID for the online account. The account ID will serve as the account holder’s User Id when purchasing parking time in a terminal, and when logging on to the online account web service where account holders can view their account history, create one-time codes etc.
3.In the PIN Code field, enter a four-digit PIN code to be used by the account holder when logging on to a terminal for purchasing parking time. PIN code and User Id (Account ID) will then be required in the terminal. If the PIN Code field is left empty, only User Id (Account ID) is required.
| Note: An account holder can change the PIN code at a later stage, using the web service for online account holders. A change of PIN code made by a user will be reflected on the Account Details page depicted above. |
4.Continue with entering information about the account holder’s name in the First Name and Last Name fields.
5.In the Company list box, select the name of your company.
6.In the Password field, define a password for the account holder and repeat the password in the Confirm Password field. The password will be used, in combination with the User Id (Account ID), when the user logs on to the web service for online account holders. Make sure to note the password and convey it to the account holder in a safe manner.
| Note: An account holder can change his or her password at a later stage, using the web service for online account holders. The password will then only be known by the account holder. A company administrator may generate a new password on behalf of the account holder, should the account holder lose the password. See Reset password for online account for more information. |
7.Continue with entering contact information, such as e‑mail, address, and phone numbers.
8.If the account holder is equipped with an RFID card for authentication in terminals, enter the corresponding RFID number in the RFID field. Typically, the RFID number is imprinted on the back of the RFID card. When an RFID card is used for authentication, no User Id is required when purchasing parking time in a terminal. If a PIN code has been specified for the user, the user will be prompted to enter the PIN code even when authenticating via an RFID card.
9.Leave the Active check box selected to render the online account activated upon saving the information. To deactivate the online account, clear the Active check box. A deactivated account can be activated any time later.
10.If the online account should be valid only for a limited period, specify a date in the Valid To field by using the date  control. The account will be valid up to, and including, the specified date. For continuous use, leave the field empty.
Tariff Package area.

11.In the Online Account list box, select the tariff package that applies to the account holder.
12.In the Parking Code list box, select the tariff package that applies to the account holder’s generating parking codes. The account holder can generate a parking code to be used by a temporary visitor in a terminal. In that case, the Visitor tariff package should be selected. See Parking Codes for more information on parking codes.
13.Select an Online Account Fallback tariff package to enable the fallback feature.
Also set the Online Account Fallback Time Allowed in minutes
The Online Account Fallback Time Allowed field informs the CWT how many minutes the user can park using the Online Account Fallback tariff package. When the time balance is 0, the system will return these to the CWT who will allow a purchase using these parameters.
Terminal area.

14.In the Terminal area, select the Terminal node type(s) for which the online account is valid. By design, the online account will be possible to use in all terminals connected to the specified node. To view the entire terminal structure in your company, go to the Terminal Control Centre.
15.When finished, click  to save the information and return to the Accounts page.
16.Find the new online account in the list and click  . The Account Details page is displayed.
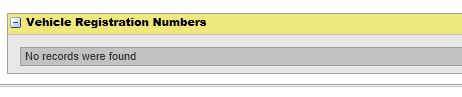
Vehicle Registration.

17.The Vehicle Registration function makes it possible to link on or more registration number to an account.
•If the Number Limit is set to zero (0) no Registration Numbers can be set.
After you have registered the maximum number of vehicles you cannot add more:
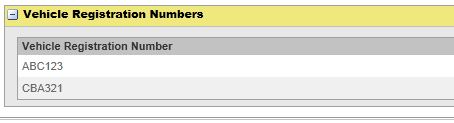
| Note: After registering the maximum number of vehicles, the input field and the ‘Add’ button will be hidden. In the example above the maximum is reached. |
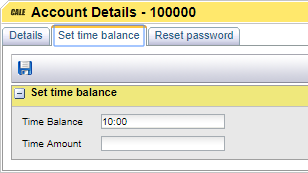
Set Time Balance tab.
After creating an account, no time is available until you set the amount by hand on the Set Time Balance Tab or until the schedule; linked to the Tariff Package assigned to the new account; runs and updates the amount. See Create scheduled deposit for more information.
18.On the Set time balance tab, enter an integer in the Time Amount field for the number of hours you want to assign. The value signifies the total number of parking time available to the account holder.
| Note: After saving, the time is displayed in HH:mm format. You cannot set the amount in this format. Use hours only. |
19.In the Time Balance field, you can see how much time is left for the account holder.
20.Click  to save changes on the Set time balance tab.
21.When finished, return to the Details tab and click  to save the information and exit the page. The online account is now ready to be used by the account holder.